

POST PRODUCTION
After a successful shoot at Leeds University it is time to put the sequence together and create a proper breakdown of work per shot.
Schedule Two
A new schedule was needed with a more relevant breakdown of the work/steps needed.

Even this though is open to adaptation as other tasks outside of this project also require attention.
Initial Edit
Threw together the best takes and added a piece of music from the Andor scene that inspired the project.
Kodak Eastman II 5247 was the go to stock for so many movies in the 70s/80s.
Star Wars, Raiders of the Lost Ark, Blade Runner and so many more. Seemed the perfect choice for my project. Thankfully some ingenious people have created LUTs that emulate the look of this stock for digital. I have the 'Apocalypse Now' LUT from Nick Driftwood.
More fine tuning of the grade needed. 'Matching' the shots to each other doesn't create a perfect match.
Clean-up & Roto Breakdown
Initial breakdown of work needed for each shot.

-
Paint out 'no smoking' signs
-
Paint out aerial
-
Replace door
-
Replace everything below balcony

-
Darken windows
-
remove camera operator reflection

-
Paint out signs
-
Replace upper windows
-
Roto character
-
Insert background buildings

-
Paint out tree
-
Paint out everything below bridge
-
Paint out everything behind bridge
-
Roto character
-
Insert background city
-
Extend buildings downwards
-
Add animated air vehicles
-
Replace windows
-
Add greebles to bridge

-
Paint out signs
-
Paint area behind character
-
Replace area below balcony
-
Roto character
Camera Reconstruction
To recreate the live action camera/lenses in Maya we need to reconstruct them through reverse engineering.
When shooting on location we ended up only doing locked off shots. The camera slider proved too problematic and we never had full control of the location, so students were always passing through shots.


In FSpy you line up the perspective lines along the Z, x, Y axis and the software can re-create the camera. Position and lens field of view are accurately calculated, even with the crop factor of the camera.

Lighting
Between setups I was able to shoot some 360 HDRI images. Then combine them in Photoshop and export as radiance images.
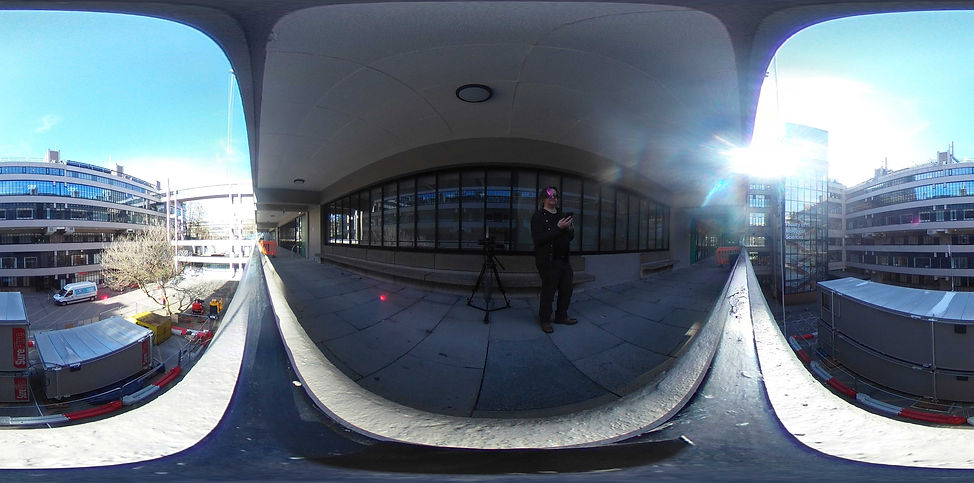
I took the additional step of retouching the HDRIs to remove unwanted elements, such as myself, the camera/tripod, etc. The fact you can retouch the combined images, without damaging the dynamic range makes the process a lot easier. Not using them for reflections means perfection is not required.

In Maya I just had to choose from three radiance maps, apply to the sky dome and the rotate to line up.


You do not rely on the HDRI light. You need to place additional lights to create better shadows, spectacularity and colour match.
Assets
Efficiency saves time and money. That's why i am using a pre-made kit of buildings. The Brutalist, from Kitbash3D is an excellent fit for architectural style.


Taking advantage of the variety of elements to the building assets I was able to quickly put together layouts for shots. With the HDRI lighting helping to integrate the everything.


Additional lighting is required to help the asset materials to better match the live plate. Also, by using the geometry of the projection screen accurate shadows are cast onto the cgi assets

To add some life to the scene I acquired some vehicles. Built by Digital Shipyard they have since, gone behind a paywall. these assets will be used in shot 4 to add life to the environment and probably shot 6 as well.
Shot Matching
A scene is shot over the course of a day or more. Different cameras & lenses, various lighting conditions. This means that there is variation between shots. To simplify the editing/grading process it is normal to 'match' all the shots to each other. You pick the best looking shot and tell, in this case Davinci, to adjust all the other shots to the same levels.Only I didn't like the results so I did my shot matching in Nuke.

Black & White Matching
In Nuke the Maya renders were matched to the Raw EXRs with a black & White match node. Made by Mazharul Islam Shuvo, this node semi automates a process that can manually take twenty minutes because you have to reverse engineer the levels between shots by figuring out the inverse values.


so, now that the colour range/space matches there is a subtle defocus of the CGI and re-grain applied to the entire image.

Straight from Maya

Matched B&W
With all the elements matching grading in Davinci Resolve is a lot easier and any LUTs wont exaggerate any discrepancies.
Shot One

Original plate.
Every shot started with a de-grain. With a fresh grain effect added at the end to the entire shot. So, it covers all the elements.


All the elements that needed removing were painted over with the clone stamp tool.
No ROTO needed.
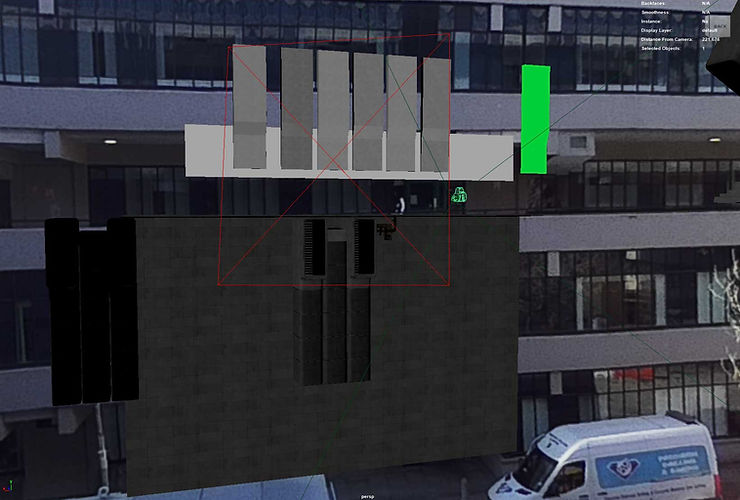
The Scene in Maya.& render.

An area light was added to improve the lighting and shadows so as to better integrate the cg elements. Especially the area below the balcony.


Black & White matching & Defocus applied to match CGI to plate.


The door comes from Sketchfab. Made by Daniyal Malik. For shot 1 I Roto-painted out the keyhole but, because, it appears in shot 4 I edited the textures.
The handrails were rotoscoped to place them in front of the door.


There was an subtle error in the Maya render. Two of the wall panels had a texture error on the bottom edge. Rather then re-do things in Maya and then re-render I just fixed it in Nuke by painting the fix with the clone stamp tool.


Shot 1 ready to send to editor.
The Nuke script.
Shot Two
Even the simplest shot can need some attention.


Also on frame left there was some distracting shadow movement so, that also, got painted out.


Shot Three & five

The original plate.


Mayas render viewer lets you add a foreground or background image to you render. This can help lineup assets and even assets setting depth of field. It basically acts like a 'pre-comp'
I set up the node tree in parallel, which wasn't really necessary, because it's just two halves of the same shot. It's just that shot 3 requires additional ROTO because Ryan passes over the CGI elements.

Signage paintout.


After matching the B&W levels a little Defocus was used to loose the sharpness of the CGI. ROTO was used to bring the bridge pillars in-front of the wall panes. With additional ROTO used to bring Ryan in-front of everything. some extra ROTO was needed for where he crossed over the CGI background.


After matching the CGI some grading was used to better match the highlight levels.
This city element was made alongside the element for shot 6 so that they would matchup.


Shot 3 ready to be sent to the editor.
The Nuke script.

Shot Four
Shot number four.The 'money shot', the most complicated shot in the scene and an entire project in itself.

Maya Scene Referencing
Maya has it's strengths but stability with large scenes isn't one of them.


This worked because of the duplicated lighting and cameras.
The main reason though was 'referencing'. Instead of large bulky scene files I just tell Maya to read the data from another file. This means I can add lots of objects and geometry without breaking Maya.
In theory.
Camera Projection
To help line up new elements and capture correct shadows and shade most of the elements in shot were re-constructed via camera projection onto basic geometry.


There were a few problems with mismatch between the main camera and the projector.
I think this is because the renderer needs to interoperate the 3D objects as 2D. that way they still line up with the background image. Almost like rendering in orthographic mode.


The projected plate only looks correct within the field of view of the projection camera.

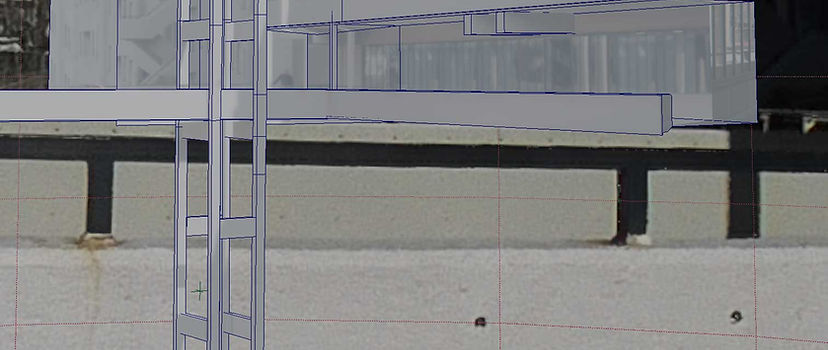
A duplicate of the imported camera is made and used for the animation.
The Full geometry looks like a papercraft model.
2.5D Scene Reconstruction
To create a camera move in post the buildings had to be 'camera projected' onto basic geometry and a virtual camera animated.

Even in 3D you have to think in layers. As the camera moves there should be parallax.
Problem is, it's a 2D image.So, as the camera moves to the right parts the left side of the bridges, the left walkway ceiling and side wall should be revealed, but there is nothing there. So, the image breaks.

When we got to the location there was a surprise. A tree growing in the courtyard, that wasn't visible in any of the online research images.Solution was to paint it out.
Using Photoshops 'Vanishing Point' tool I was able to match the 3D perspective of the building and use the Clone Stamp to paint over the offending tree. The grid forces what ever you are cloning to scale and match the perspective of were you place it.
The bridges were extended to the left so as that piece of geometry is revealed it doesn't break the image.
Also, the ridge pillars had painted extensions and the bracing blocks were also multiplied through the vanishing point tool.


I painted a wall across the end of the walkway to better fit changes being made


The handrail geometry sits on top of the image. So, the low wall had to be isolated and painted to remove the 2D rail.
The wall edge was also extended to the right and an alpha mask created in Photoshop to roughen up the edge that would otherwise have been too smooth thanks to the simple geometry.


After re-painting and projecting the elements on the roof of the left hand walkway I realised the one on frame right was empty. The left hand building has a different use so must have had modifications. After checking the original location images I added to support beams for accuracy.
Nuke Compositing
Foreground building elements and the extension to the Stevens building were rendered on one layer with the bridge building geo covered in the shadow matte material.
The handrail on the bridge was included with the idea that Ryan would be added back in behind this layer.


The live plate projection rendered through the animated camera. With Ryan removed.

I added a 3D speeder to the Background to make things a bit more interesting. It was animated taking off from a building that had a convenient landing pad.
Whilst every other speeder had 'linier' animation this one had to slowly rise and then accelerate.
The background city was laid out by using the render overlay to position each building.
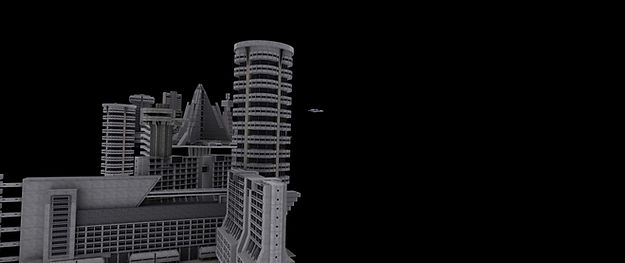


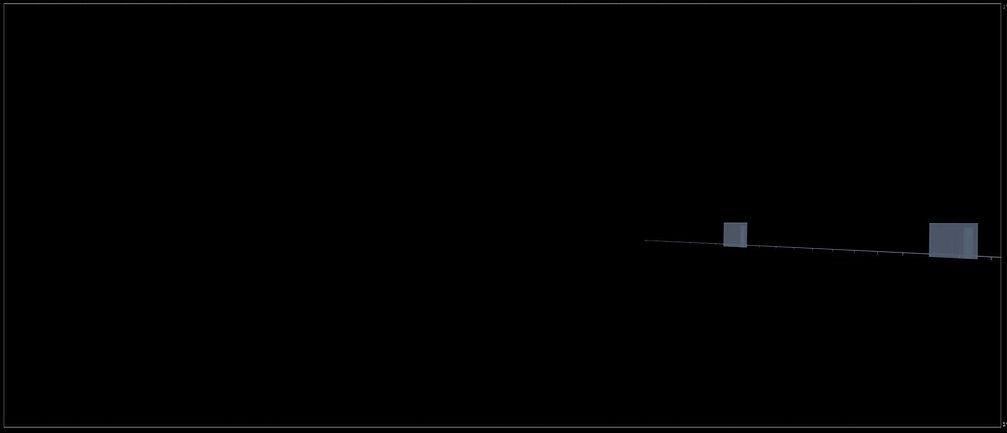
I decided that the Foreground speeders were too large and distracting. Rather than re-rendering, I used a transform node to scale them down. This meant they disappeared before the edge of frame but, I was cropping the shot so it was fine.
I was going to use Vector Motion Blur.
rendered as a layer in the EXR sequence it would allow me to fine tune the motion blur in Nuke. Maya chose not to co-operate. So, motion blur was added in Nuke via the motion blur node.

I added the door from shot one to the right side to breakup the wall of glass and 'reflect' the opposite building.
I rendered some orthographic views of a mixture of speeders. Then used them as 2D elements in the background of the shot.


I modified the limousine base texture so there was more then one colour.
I also used the 'mirror' node so that I could have some speeders going in the opposite direction.

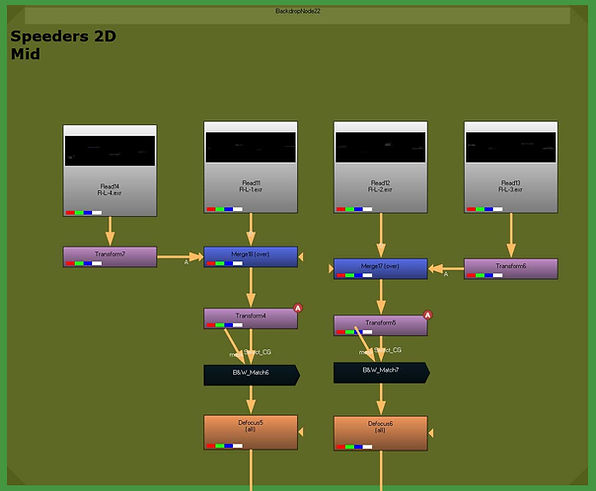
Speeders had a 'linear' animation, so constant speed. Some were linked to share animation and reduce the node tree.
Black & White matching and Defocus for all elements.
Ryan
At the heart of this shot is Ryan, our protagonist. Because of the projection mapping to geometry, cutting up the live plate and replacing the background my actor, Ryan was removed from the shot. I need to put him back.
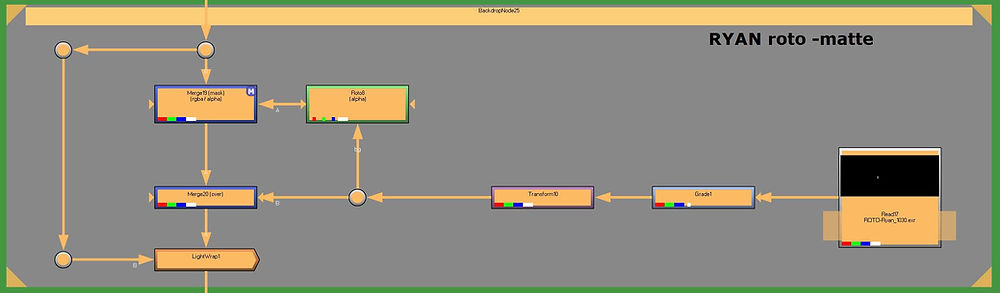


Ryan was rotoscoped out of the live plate and rendered as a separate image sequence.
When he was placed in the new composite there was an issue with the alpha channel. So, I extracted the matte from the frames and placed the image on top. Probably because the comp was built front to back.


Problem was there was a small matte line. There are several solutions to this but, a simple lightwrap did the trick.
The assumption would be that Ryan would have to be tracked to the bridge, because of the camera motion, that is missing from Ryans element. Except you don't notice because he is so small in frame and the ship in perspective is tiny.


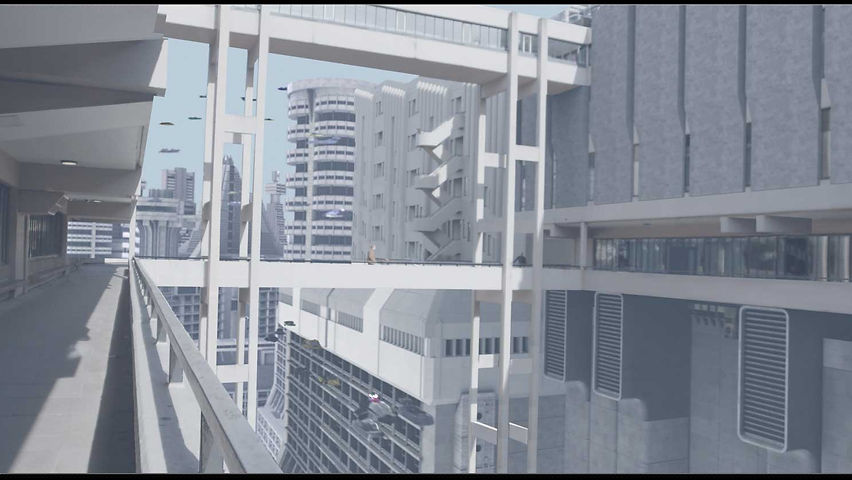
Shot Six
Shot 6 shared assets with shots 4 and 3 & 5. So, they had to be designed together to make sure everything worked across all the shots.

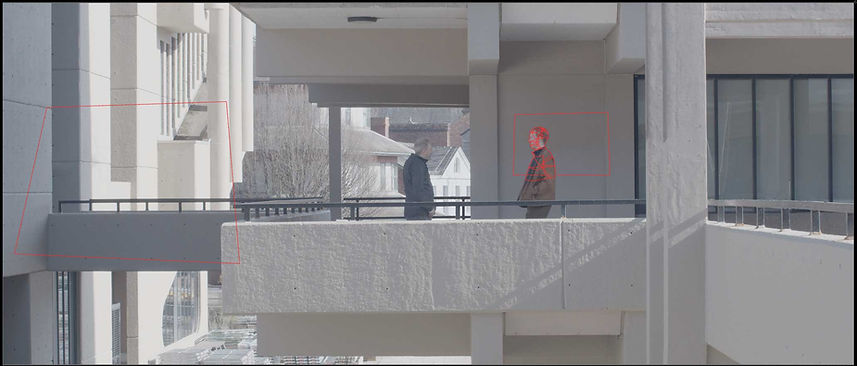


Also the beam at the bottom of the frame was trimmed so it revealed more of the space.
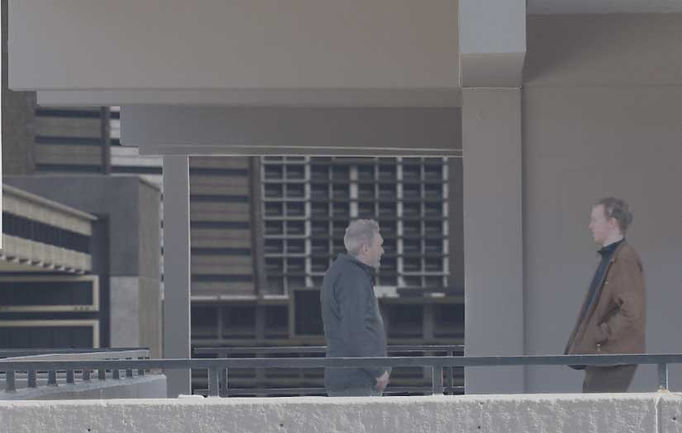
The issue was the natural light wrap caused by the midday sun. Because of the white buildings and strong sun Jamie's jacket was heavily affected and it didn't fit when the CGI was added.




Finishing Touches

